How to Measure Ingredients Accurately Without a Kitchen Scale
Measuring ingredients accurately without a kitchen scale is a common challenge in home cooking and baking. While weight measurements offer consistency, volume measurements using cups and spoons remain widely used, particularly in American kitchens. Understanding the relationship between volume and weight, along with proper technique, allows cooks to achieve reliable results with everyday tools. This article outlines practical methods for measuring flour, sugar, and butter precisely, along with key conversion principles and contextual factors that influence accuracy.
The information presented here focuses on process and methodology rather than guaranteed outcomes. Accuracy depends on multiple variables, including ingredient density, humidity, storage conditions, and the specific measuring tools used. By approaching volume measurements with care and consistency, cooks can reduce variability and improve reproducibility in their recipes. The techniques described are applicable in most home kitchen settings and require no specialized equipment beyond standard dry and liquid measuring cups and spoons.
It is important to note that volume-to-weight conversions are approximate and can vary by source and ingredient brand. The following sections provide a framework for measuring common ingredients without a scale, emphasizing technique and awareness of influential factors. This information is intended for general educational purposes and does not replace professional judgment or specific recipe instructions.
Understanding Volume-to-Weight Relationships
Volume measures the space an ingredient occupies, while weight measures its mass. The two are related through density, which varies significantly among ingredients. For example, a cup of all-purpose flour weighs less than a cup of granulated sugar because flour is less dense. This fundamental difference means that a single conversion factor cannot be applied universally. Cooks relying on volume measurements must therefore use ingredient-specific approximations and consistent techniques to achieve comparable results across preparations.
Standard volume-to-weight conversions exist for many common ingredients, often derived from established culinary references. For all-purpose flour, one cup is generally considered to weigh approximately 120 to 125 grams, though this can range from 110 to 150 grams depending on how the flour is settled and scooped. Granulated sugar is denser, with one cup weighing about 200 grams. Butter, often measured by volume in the United States, is typically sold in quarter-pound sticks equivalent to half a cup or eight tablespoons. These approximations serve as useful benchmarks, but they are not absolute.
Several factors can influence the actual weight of a given volume of ingredient. Humidity can cause flour to absorb moisture and become heavier. Settling during storage or transport can compact ingredients, increasing the weight per cup. The method of filling the measuring cup—whether scooped directly from a bag or spooned and leveled—also dramatically affects the amount of ingredient captured. Awareness of these variables encourages a more deliberate approach to volume measurement and helps cooks interpret recipe instructions with appropriate flexibility.
Consistency in technique often matters more than the specific conversion number used, as it reduces variation from one measurement to the next.
When converting a recipe from weight to volume or vice versa, it is advisable to use a reliable reference and to note the assumed conversion. Many modern recipes provide both weight and volume for key ingredients, which can serve as a guide. For ingredients not listed, starting with a standard conversion and adjusting based on observed results can be a practical approach. However, adjustments should be made cautiously, as small differences in ingredient quantities can influence the final product, particularly in baking where chemical reactions are sensitive to ratios.
Measuring Flour Accurately Without a Scale
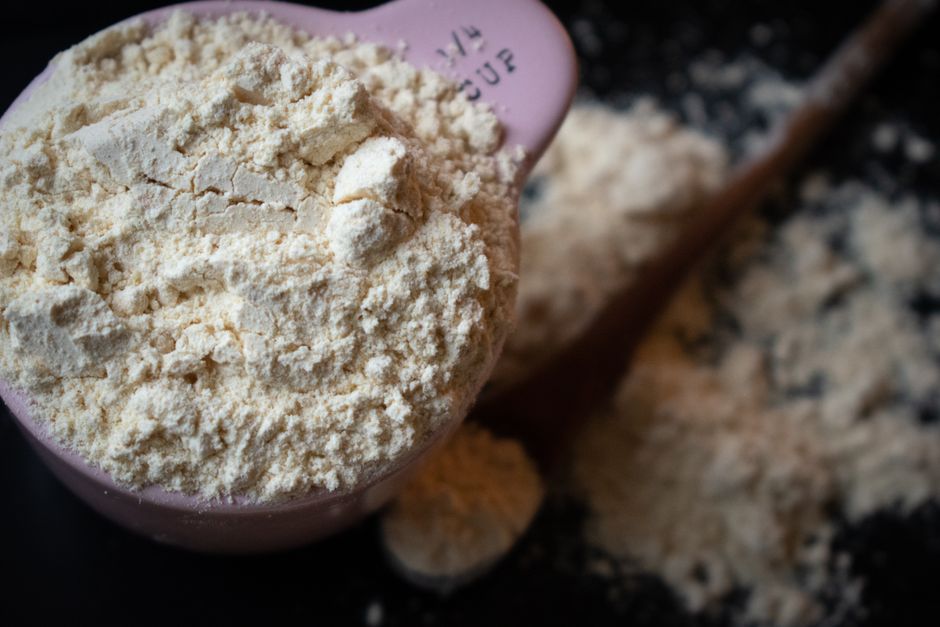
Flour is one of the most challenging ingredients to measure accurately by volume due to its tendency to compact and its variable density. The most reliable method without a scale is the spoon-and-level technique. This involves fluffing the flour in its container to aerate it, then using a spoon to transfer it into a dry measuring cup. The cup should be filled without tapping or shaking, and the excess should be leveled off with a straight edge, such as the back of a knife. This method helps prevent the flour from becoming densely packed, which would result in an overly heavy cup and a drier final product.
Scooping directly from the bag or container with the measuring cup is a common practice but often leads to inconsistent results. When the cup is pushed into the flour, it compresses the flour and can capture significantly more than intended—sometimes up to 150 grams per cup instead of the standard 120 to 125 grams. This discrepancy can alter the texture and structure of baked goods. For recipes that are particularly sensitive to flour quantity, such as cakes and pastries, the spoon-and-level method is generally preferred. It is also helpful to stir the flour before measuring if it has been sitting for an extended period.
Different types of flour exhibit distinct behaviors. Whole wheat flour tends to be denser and may require additional aeration. Bread flour has a higher protein content and can absorb more liquid, but its volume-to-weight ratio is similar to all-purpose. Cake flour is finer and lighter, often weighing around 100 grams per cup when properly measured. When substituting flours, it is important to consider both the weight and the protein content, as these factors influence hydration and structure. Without a scale, using the spoon-and-level technique for each type provides a consistent starting point.
Environmental conditions also play a role. In humid climates, flour can absorb moisture from the air, increasing its weight per cup. In dry conditions, it may become static and harder to measure uniformly. Storing flour in an airtight container can help stabilize its moisture content. If a recipe yields unexpected results, the flour measurement is often a primary suspect for volume-based cooks. Keeping a record of the technique used and any adjustments made can help refine future measurements and build a personal reference for what works in a given kitchen environment.
Measuring Granulated and Brown Sugar
Granulated sugar is more straightforward to measure by volume than flour because its crystals are uniform and it does not compact as readily. The standard approach is to spoon the sugar into a dry measuring cup and level it off with a straight edge. Because sugar is denser, a cup typically weighs around 200 grams, and slight variations in packing have less impact on the overall quantity than with flour. However, it is still advisable to avoid scooping directly with the cup, as this can create inconsistencies, especially if the sugar has hardened or clumped.
Brown sugar presents a different set of considerations due to its moisture content. Recipes often specify whether brown sugar should be packed or loosely measured. Packed brown sugar is pressed firmly into the measuring cup, while loose brown sugar is spooned in and leveled without compression. The difference in weight can be substantial—one cup of packed brown sugar may weigh around 220 grams, while the same volume loosely filled could weigh significantly less. Following the recipe’s instruction is essential, as the packing method affects both sweetness and moisture in the final product.
When a recipe does not specify, the default assumption for brown sugar in most American recipes is packed. To pack brown sugar, use the back of a spoon or a spatula to press it into the cup until it holds its shape when turned out. For loose measurement, simply spoon the sugar into the cup and level it off gently. Understanding these distinctions helps maintain the intended balance of ingredients. It is also worth noting that brown sugar can dry out over time, becoming hard and difficult to measure accurately. Proper storage in an airtight container can help preserve its texture and measuring properties.
Measuring Butter Without a Scale
Butter in the United States is commonly sold in sticks that are pre-measured, which simplifies volume measurement. Each standard stick weighs four ounces or 113 grams and equals half a cup or eight tablespoons. The wrapper typically includes tablespoon markings, allowing cooks to cut the stick at the desired line without any additional tools. This pre-marked packaging is a reliable method for measuring butter accurately, provided the stick is at a consistent temperature and the markings are clear.
When butter is not in stick form, or when a recipe calls for a specific volume, measuring by displacement or using dry measuring cups can be effective. For solid butter, the water displacement method involves filling a liquid measuring cup with a known amount of water, then submerging pieces of butter until the water level rises by the desired volume. For example, to measure half a cup of butter, place half a cup of water in a two-cup measure and add butter until the water reaches the one-cup mark. This method is accurate but requires the butter to be solid and the water to be at a readable level.
Softened or melted butter can be measured with dry measuring cups or spoons, though consistency is key. Softened butter should be packed lightly into the cup and leveled off, similar to brown sugar but with less compression. Melted butter can be poured into a liquid measuring cup and read at eye level. It is important to allow melted butter to cool slightly before measuring if the recipe requires it, as hot butter can affect the volume reading and potentially cook other ingredients if added directly. Regardless of the method, using the same technique consistently helps reduce variation.
Temperature influences butter’s volume and behavior. Cold butter is firm and easy to cut along markings, while softened butter is pliable and can be packed into cups. Melted butter expands slightly and may measure differently than solid butter. Recipes often specify the temperature for a reason, as it affects creaming, emulsification, and the final texture of baked goods. When measuring without a scale, paying attention to the butter’s state and following the recipe’s cues can help achieve the intended result. Storing butter properly and planning ahead for softening can make the measurement process more predictable.
Practical Tips for Consistent Volume Measurement
Beyond ingredient-specific techniques, several general practices can improve the reliability of volume measurements. Using the right type of measuring tool is fundamental: dry measuring cups are designed for solid ingredients and allow for leveling, while liquid measuring cups have spouts and space above the measurement line for ease of pouring. Using a dry cup for liquid or vice versa can introduce errors. Similarly, nested measuring cups and spoons should be filled to the brim and leveled for dry ingredients, whereas liquid cups should be read at eye level at the bottom of the meniscus.
Maintaining a consistent technique across all measurements is perhaps the most impactful step. This includes how the ingredient is transferred, whether it is compacted, and how the excess is removed. For dry ingredients, the spoon-and-level method is a reliable default unless the recipe specifies otherwise. For liquids, pouring into a cup on a flat surface and checking the level at eye level reduces parallax errors. Practicing these techniques and observing their effects in recipes can help cooks develop a sense of what a properly measured cup looks like for different ingredients.
Organizing the workspace and pre-measuring ingredients before starting a recipe can also contribute to accuracy. Measuring each ingredient into separate bowls, often called mise en place, allows for focused attention on technique and reduces the likelihood of distractions. It also provides an opportunity to double-check quantities before combining ingredients. Keeping a small notebook or digital record of measurement observations—such as how a particular brand of flour measures or how packed brown sugar appears—can build a personalized reference over time. While no method without a scale is perfect, these practices can help minimize variability and support consistent results in the kitchen.